Adding Vents to Soffit
Anyone who’s been in an attic during a summer day can attest it’s a hot place to be. Having all that heat above your living space isn’t just hard on your air-conditioning bills. It can damage your roof. Control temperatures naturally by increasing circulation by adding vents to soffit.
 Attics stay cool (relatively speaking) by use of natural venting. Hot air rises and escapes from rooftop vents, and is replaced by cooler air drawn in through venting in walls and the overhang of eaves. If your home doesn’t have enough venting, you’ll be left with a stuffy attic.
Start by determining if you have enough ventilation already. As a rule of thumb, you’ll want one square foot of vent for every 10 square feet of attic floor space. (Determine your magic ventilation number by multiplying your attic’s length by its width and dividing by 10.)
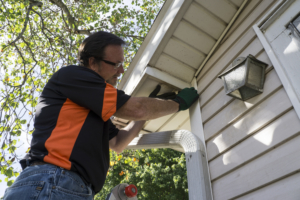
If you need to increase ventilation, adding vents to soffit is a relatively easy project, even for novice handymen. Remember to use eye protection and follow ladder safety before you start the project.
- Locate places for new vents. You’ll want to find spots that are between rafters, and evenly spaced throughout the attic. After you install them, you may need to clear insulation or other debris from their top.
- Use the vent itself as a template to guide installation. Trace around the edge of the vent. Remove the vent and draw cut lines about 3/4″ of an inch inside the vent’s outer edge.
- Cut the hole. You’ll need a keyhole saw or a jigsaw to remove material. Drill holes at each corner of your cutline using a bit slightly larger than your saw’s blade.
- Fit the vent in the hole, and secure it using wood screws.
Depending upon your skills and how many vents you need to add, the project typically takes less than an afternoon. Adding vents to soffit won’t solve your cooling issues entirely, but it’s a great first step toward overall attic health.